Documenting December: Inside my 2024 December Daily Album + Mini Tutorial
- Jul 2, 2025
- 4 min read

Merry Christmas in July!
Over the past several months, I’ve been working on finishing my 2024 December Daily album—and I’m excited to say it’s officially done! Starting today and continuing throughout July, I’ll be sharing a story each day from this album.
This is the time of year when excitement starts to build for the release of December Daily products in Ali Edwards' shop. If you’re like many scrapbookers, you might still be putting the finishing touches on your 2024 album. There’s always that push to get it “done by December” before a new season begins.
My goal this month is to inspire digital memory keepers like you to finish those pages—one story at a time. Some days (like today!) I’ll also include a mini tutorial featuring a fun digital technique.
Behind the Scenes: The Tech I Used
If you’ve been following me for a while, you know I’m a big fan of the Affinity Suite of products for both desktop and iPad. I’ve been creating digital December Daily albums with Affinity Photo for iPad since 2016.
But this year, I changed things up! For my 2024 album, I used Affinity Publisher for iPad—just like I did for my Week in the Life album. It’s been a game-changer to view my pages side-by-side. Publisher also makes it easy to jump into Affinity Photo or Affinity Designer when I need tools not built into Publisher.
I’ll definitely share more about my experience using Publisher as the month goes on. But first, let’s look at the pages I’m starting with today: the Cover, Reason Why, and Table of Contents.
A Little Tip for Following Along
With each post this month, I’ll include a link to the corresponding day on Ali Edwards’ blog. I encourage you to open both posts side-by-side. Why? Because I’ve done my best to digitally recreate her layout and design style using the digital versions of the same products she used.
Of course, some elements—like interactive pieces—aren’t possible in digital, but I’ve aimed to stay as true to her pages as I could.
I can’t wait to show you what I’ve made! Let's get started!
December Daily Cover Page, Reason Why, + Table of Contents
Here is the link to the corresponding post on Ali's blog that was inspiration for these pages: Ali's Intro

The colors of 2024 December Daily products were so colorful and fun. The letters on the tag are the initials our first names (Chris + Kelly). The letters and numbers have a 3D Effect added to them to replicate a "puffy sticker." On Ali's page she punched the word "joyful" from one of the Specialty Journal Cards with a 2-inch circle punch and attached it a circle tag. If you look closely at the photo above, you can see I did a digital version of the same thing by clipping the digital version of the Joyful Specialty Card and layering it on top of the digital circle tag with the green border. The photo below shows what it looks like with the color wheel "flipped" up.
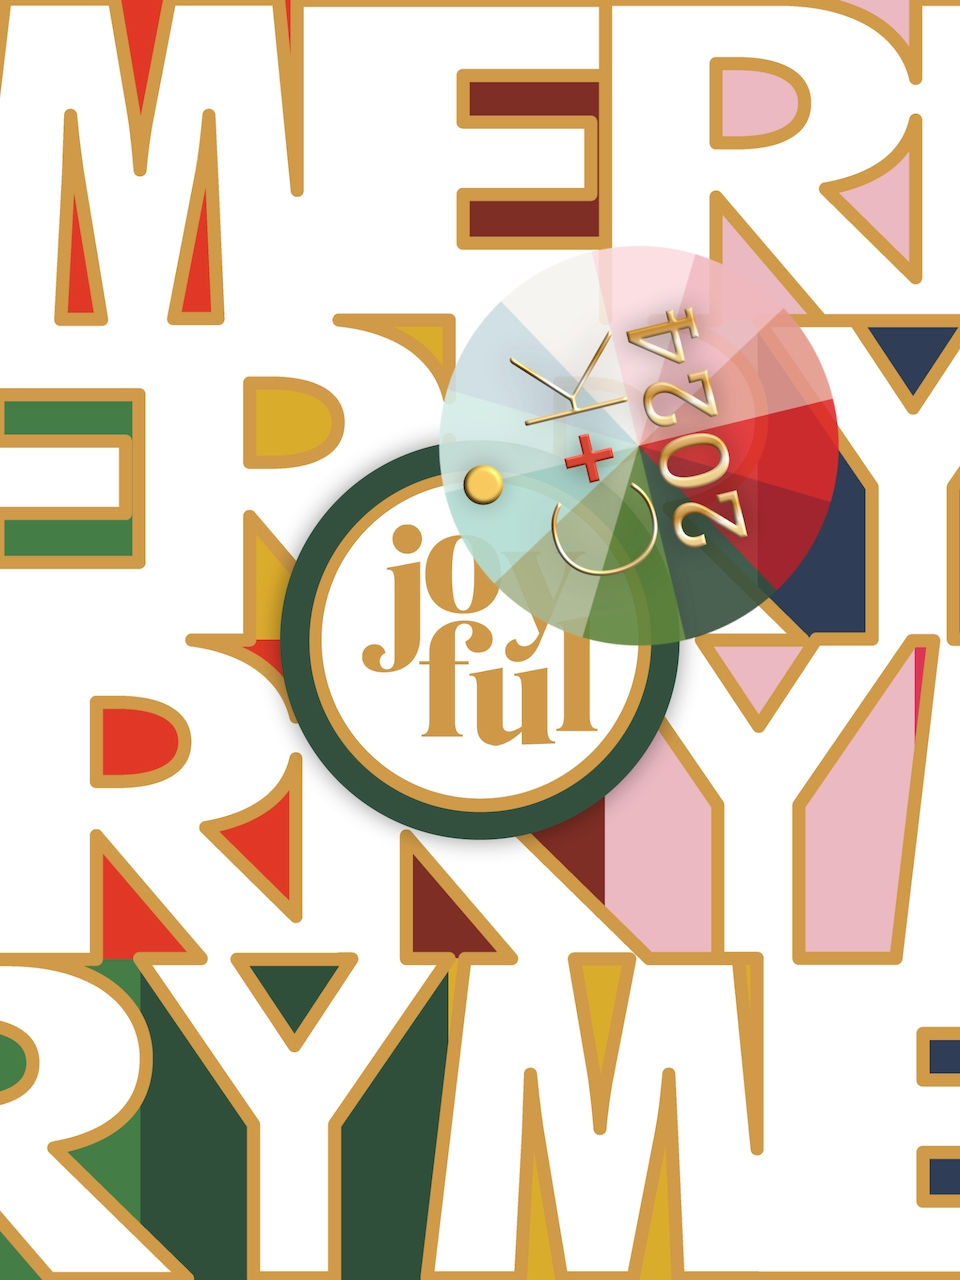
I know on Ali's tag she has a green striped ribbon. I am not a fan of scanning real objects and then using them as embellishments for pages (except for stitches). But I do love a brad. So I created a digital brad to use in place of the ribbon
The spread below is of my Reason Why + Table of Contents. Please feel free to click on the image to enlarge it!

Ali created a folded paper flap with her "Reason Why" attached to the other side of that flap. I really couldn't do that in a digital format, but I think what I did uses many of the elements she used–the bow, washi tap, the custom title, and the stitches.
Let's talk about those stitches. These are actually a digital brush by Katie Pertiet. Affinity Publisher for iPad does not have a brush tool. But within Publisher you to switch to the Affinity Photo persona, provided you have Affinity Photo downloaded. This allows you to use tools in Photo that Publisher does not have. Then when you are done using a tool, the Brush Tool in this case, you can easily switch back to Publisher!
The Table of Contents was so much fun to put together. Knowing I wasn't able to replicate Ali's awesome handwriting, I am super happy with the way my digital version turned out! Want to learn how I did it? Good! I created a mini tutorial for you to watch! Check it out below:
Thank you so much for reading! If you have any comments/questions, don't hesitate to comment below!
Products used:
Katie Pertiet Digital Brushes
Digital brad-my own design
Remington Noiseless Font
Nightjump Font
Affinity Publisher for iPad
Affinity Photo for iPad


Thx for this awesome tutorial, I learn so much from your vast knowledge of this software and its capabilities, as well as your talent!
Nice job and am enjoying your process. I have an old computer CD that has Ali’s handwriting as a font! You could use that for your project!
This is so cool! I look forward to seeing all of your pages. :)